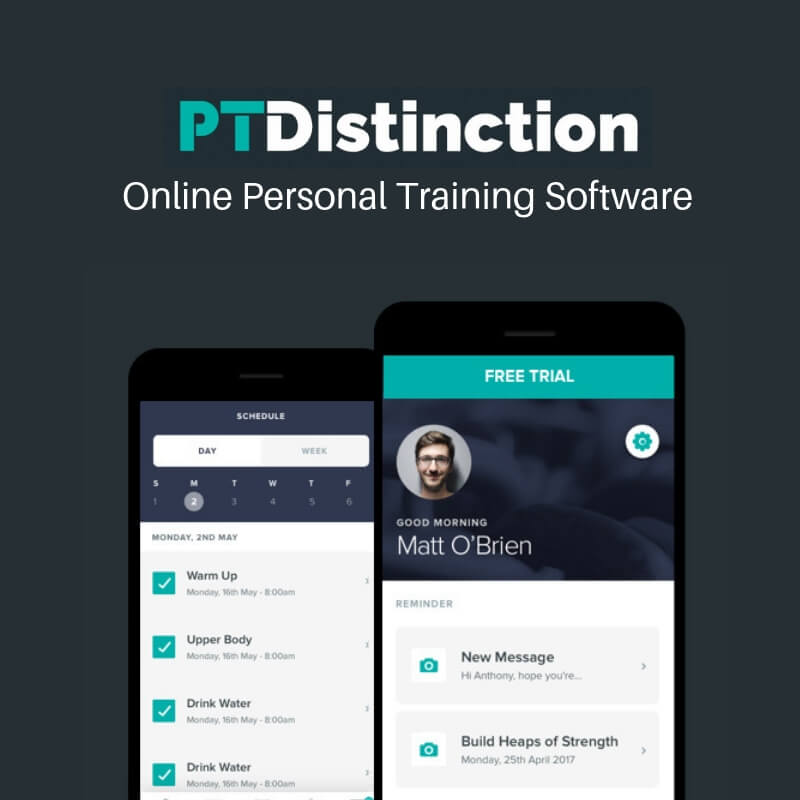

Stock photography is convenient and accessible, especially if you're new to the fitness industry. But, it doesn't quite tell a unique or memorable story about your brand and its personality to your target audience. Investing some of your budget towards custom images and visuals for your website, and social media platforms, can change how you are perceived.
However, without a big budget to hire a professional fitness photographer, many personal trainers are left wondering how to take high-quality content.
I know that photography equipment is expensive, and that learning the software takes time. I'm here to tell you that you may not need all that! All you need is that small but super-powerful tool in your pocket.
If you have a smartphone with a good-quality camera, you probably have everything you need for website-quality photos already!

This article will show you how to make the best of the equipment you already have. With 12 content-creation tips and 13 concept ideas, you can capture brand-relevant, quality images that are distinctive and that Google and potential clients will love.
12 Fitness Photography Tips for Shooting High-Quality Photos
Here are our twelve tips for a successful fitness photoshoot to help you create content to elevate your online presence.
1. Clean Your Lense
Before taking your photo, cleaning your lens will make a big difference to the clarity of the image. Ideally, use a microfibre cloth, but for your phone lens, even a wipe on your t-shirt will be better than nothing. You don't want echoes of your sweaty prints or specks of your lunch blocking your image during the shoot.
2. Use Gridlines to Help Compose Your Shot
Composition is all about how the different elements of your shot interact with each other. You don't want an image that feels too cluttered and unconsidered. ,
To help you with composition, use the grid line feature on your phone. Turn these on in your smartphone camera settings. A great rule to follow for composition is the rule of thirds.
Your grid splits your screen into nine, equally-sized cubes. The rule of thirds encourages you to have a different element in each row of the grid.
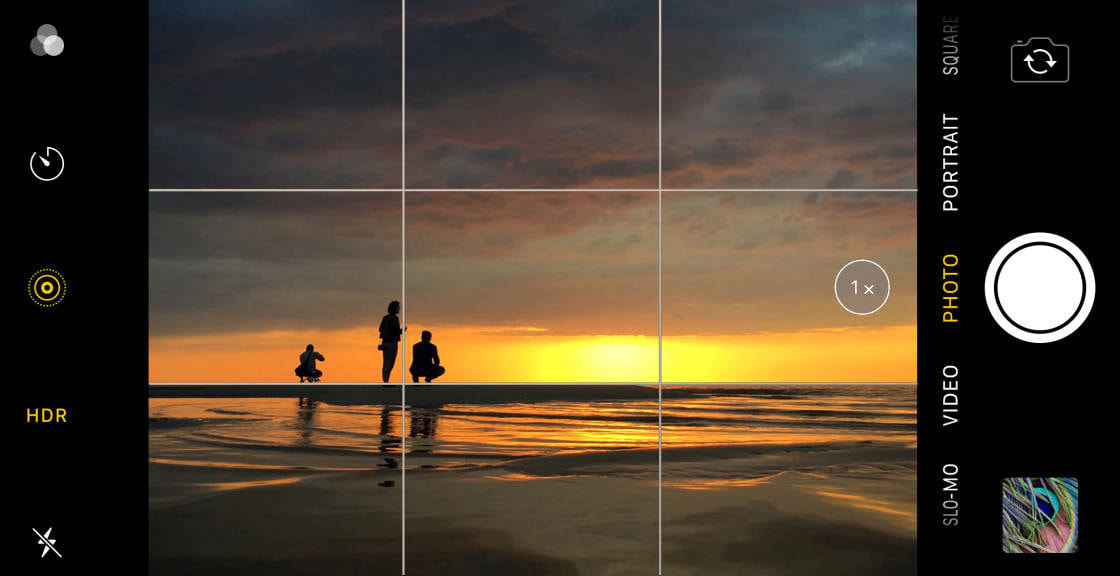
You may not have a tripod so, gridlines also help you ensure your image isn't skew. Getting the balance of the image during the shoot is much easier than trying to edit things out later. Aligning your gridlines can help to create a sense of balance as well as straighten lines in the image.
3. Have a Focal Point/Subject
The central focus of your image or subject is what you want the image to highlight. What do you want the viewer to pay attention to when they look at the image? Identify that and make sure everything else acts as a support to this subject.
For example, imagine you're using a client as one of your fitness models. You're taking a photo of them celebrating after a workout. You need to frame them properly and make sure nothing in the background distracts from them.
You also want to make sure you haven't chopped off the top of their head, their arms, or any of their upper body.
There should also be a focal point, the part of your image that is in focus. This ensures your subject isn't blurred and that the viewer's eye is drawn to them. Use your camera settings to emphasize your subject by using a 'Portrait' feature, for example.

This can create a pleasant background blur called “bokeh”. To set your focal point, simply tap the phone screen on the part of the image you'd like to be in focus before taking the photo.
Keep in mind that your subject doesn't always have to be a person. Making the focal point of your shot a minor detail, like the intricate knurling on a barbell, can create a compelling image. It can give viewers the sense that they can almost feel the bar themselves.
Adding a little sharpening in your edit can enhance this effect even further.
4. Use Natural Over Artificial Light
Another way to define your image subject and place focus on them is by using proper lighting. Don't be tempted to overdo the flash. If you're shooting in low light conditions – touching the screen where you want it to focus will allow the phone to balance the light automatically.
You'll get better results leaving the flash out of it.
For ideal results, opt to shoot when there is tons of natural light. Ensure the light falls onto the subject and doesn't come from behind them. You can also try to catch the best 'golden' light at sunset and sunrise.
You'll get better results leaving the flash out of it.
For ideal results, opt to shoot when there is tons of natural light. Ensure the light falls onto the subject and doesn't come from behind them. You can also try to catch the best 'golden' light at sunset and sunrise.

If you have a little bit to spend, a ring light would also be a fantastic investment in your lighting setup. They are flattering light sources, especially for close-ups and portraits, and they can serve a double function as a tripod for stability.
5. Experiment With Leading Lines
These are lines in your content that “lead” the eye to the subject or focal point. They can be circular or straight, but direct the viewer's eye through the image. You could find them in a gym by shooting up a staircase and putting the banister in the foreground.
Or you can create them by shooting along a barbell or using a battle rope as your leading line.
Or you can create them by shooting along a barbell or using a battle rope as your leading line.
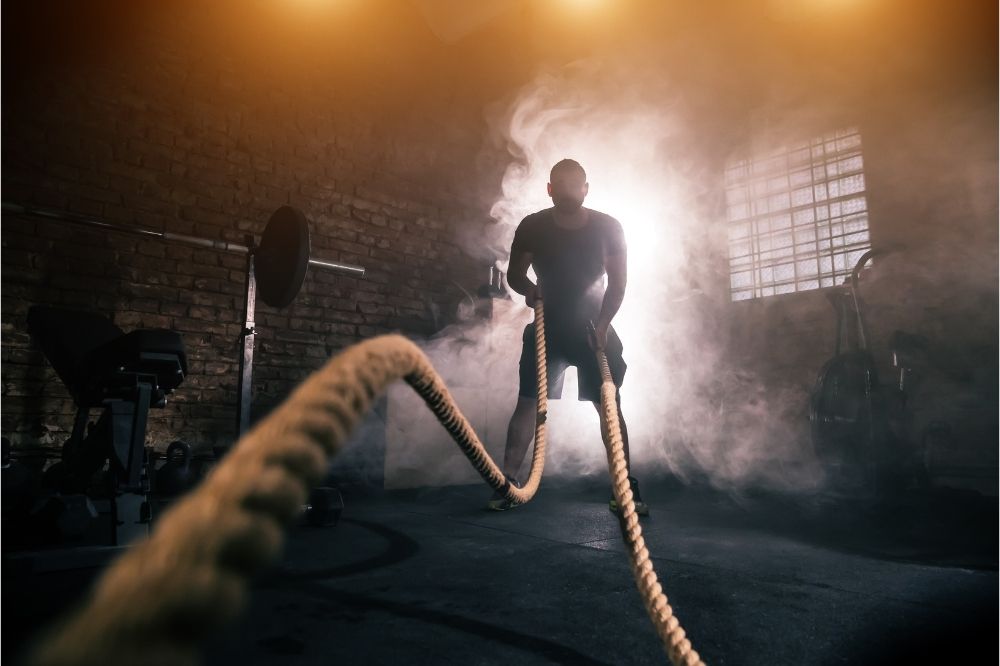
Photography is all about creativity so play around with your environment and what it can offer you.
6. Use Negative Space
This is the area of your image that does not contain your subject. It could be a large wall or an expanse of open sky. Put the subject of the photo in no more than one-third of the image and leave two-thirds blank for a dramatic effect.
This is especially important if you're going to use the image as a website header image because you'll need some room for the header text and call to action. Like this:
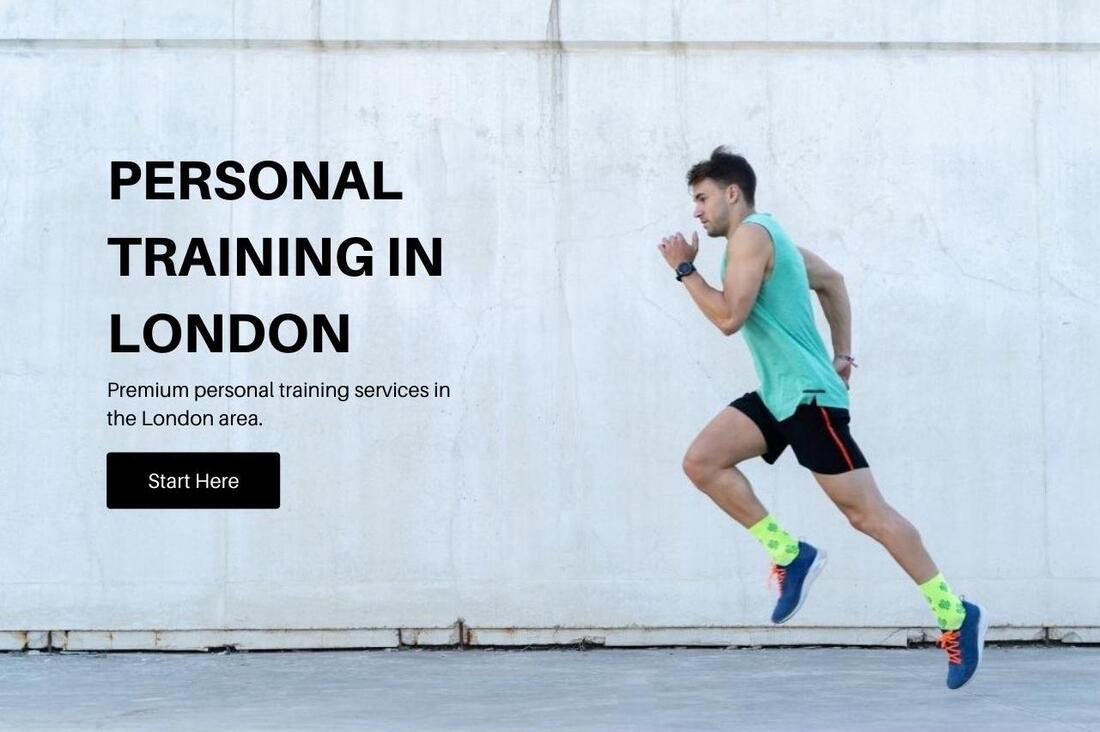
Images with lots of negative space also lend themselves to campaigns and other fitness marketing strategies. You can slot in text into the blank space, insert a QR code, and much more.
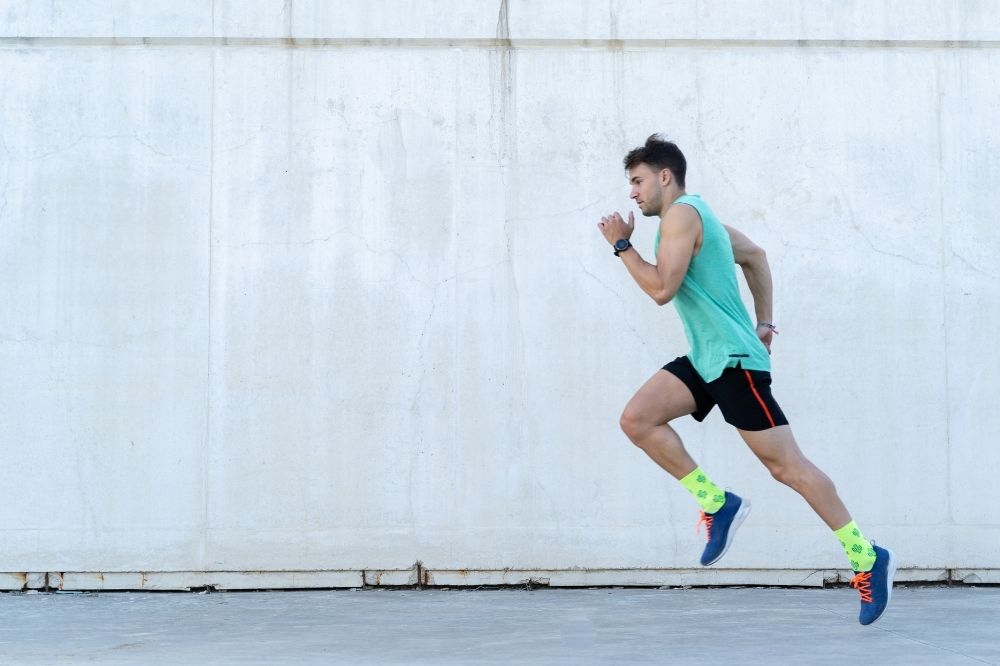
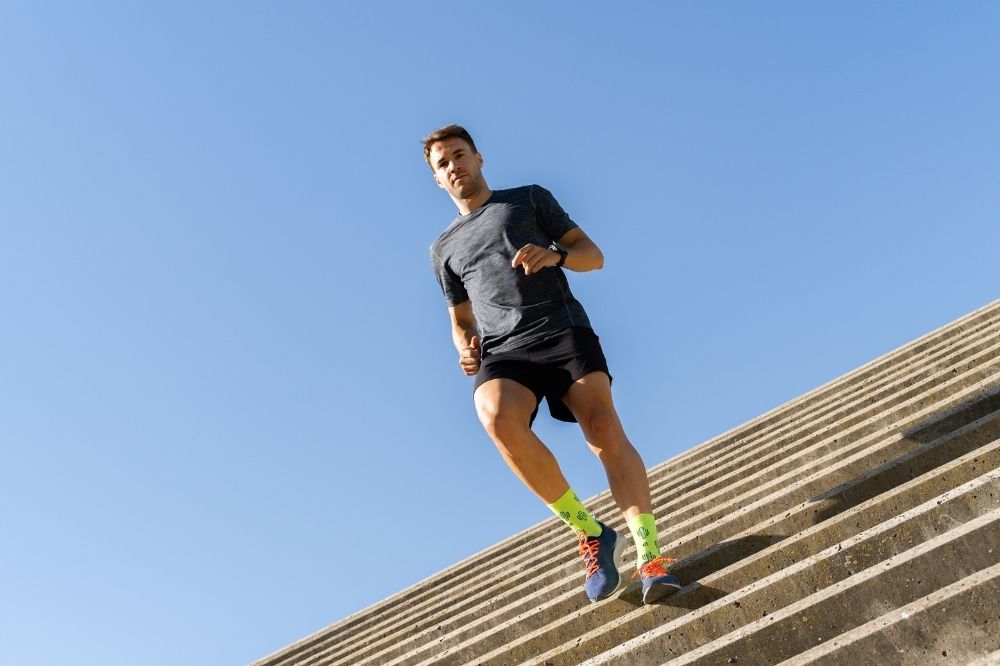
7. Try a Wide Range of Perspectives
A negative-space-heavy shot, a portrait, an action shot in training – all of these can have the same subject from a different perspective. During your shoot, try different angles, scenes, and more to get a variety of dynamic shots.
For example, rather than taking the image at eye level, consider changing it up. Lie on the floor and shoot up to make your client look like a hero (called 'Hero Shots'). Or climbing up high to get a shot from above.
Perspective can transform the story that your picture tells.
For example, rather than taking the image at eye level, consider changing it up. Lie on the floor and shoot up to make your client look like a hero (called 'Hero Shots'). Or climbing up high to get a shot from above.
Perspective can transform the story that your picture tells.
A key perspective note to remember is to avoid zooming as much as you can. Instead of staying still and zooming in on your subject, try to get physically closer. This keeps the image from becoming pixelated and blurry.
When you zoom to magnify an image, all the tiny movements of your hand become magnified too so it's much harder to get a good quality shot. If getting closer isn't possible, you could take the image from a zoomed-out position and crop it down later.
As you plan your shoot, consider drafting a shot list to ensure you get a variety of perspectives.
8. Use Reflections
For interesting angles and perspectives, look for opportunities to use reflections. Puddles, mirrors, and metallic surfaces can help you capture a shot that is really memorable.
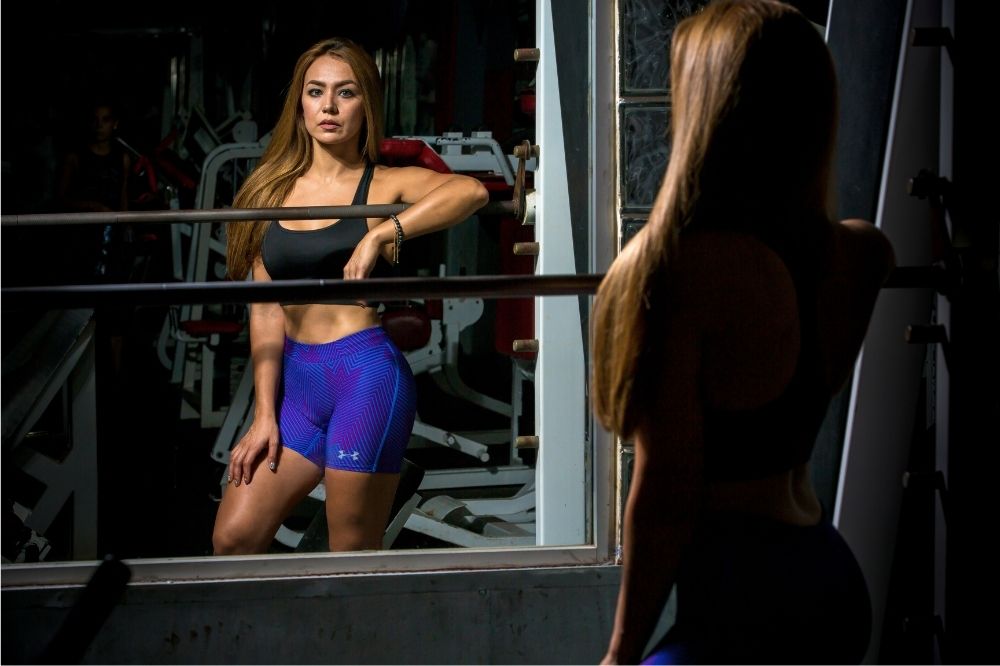
Using reflections in client images has the added bonus of feeling more natural because the client isn't looking directly into the camera.
8. Repetitive Patterns
Repetition is all around us. Even in places we don't think about. Think about the interlocking gym mats on the gym floor, dumbbells lined up against the wall, workout equipment in a row, and more.

These are all patterns that have the potential to create a strong graphic element for your photo.
Look for lines, geometric shapes, or colors that repeat. They can create a striking photo that you can use for many different functions. These can be a great free alternative to commissioning someone to design graphics for posters or website backgrounds.
10. Consider Symmetry
Symmetry can create a sense of proportion and balance in your image. It's one of the simplest ways to create a pleasing image and works particularly well for sleek, clean fitness campaigns.
If you've mastered gridlines, this content creation trick is easy to achieve. Use your grid lines to divide your shot into two halves that reflect each other.
If you've mastered gridlines, this content creation trick is easy to achieve. Use your grid lines to divide your shot into two halves that reflect each other.
11. Use a Tripod
Another equipment item that can have a tremendous impact at a low cost is a phone tripod. Even a small, Gorillapod-style tripod attachment can transform your potential for creating exciting content.

Attach it to your phone and you can set it up just about anywhere. They're freestanding like a normal tripod but flexible enough to attach to a rig or pull-up bar, for example.
You can get some creative and amazing shots using a tripod. And they can be small enough to carry in your gym bag all the time.
12. Learn How to Edit
Editing, editing, editing! Even an image you felt wasn't your best during the shoot can still be usable with a good edit.
Taking some time to learn the basics of editing software can make the difference between a good photo and a great photo. Plus, you don't have to pay for software if you cannot afford it.
Platforms like Canva give you free yet comprehensive editing tools and they're easy to use. With Canva, for example, you can access filters, special effects, graphic design, and other image editing systems.
13 Personal Trainer Photoshoot Ideas
Whether you are a fitness coach, healthy living specialist, or gym owner, here are 13 personal trainer photoshoot ideas to inspire you. These are low-cost concepts all fitness professionals can implement. No need for a professional photographer!
- Spatial shots of the gym space including gym equipment, rooms, etc
- Action shots of dynamic movement like jumps, sprints, etc
- In-class pictures of people in group fitness classes or sessions
- Pilates, aerial exercise, and yoga poses that demonstrate stability and flexibility
- Meditation and wellness sessions and poses
- Exercise experiences at outdoor locations
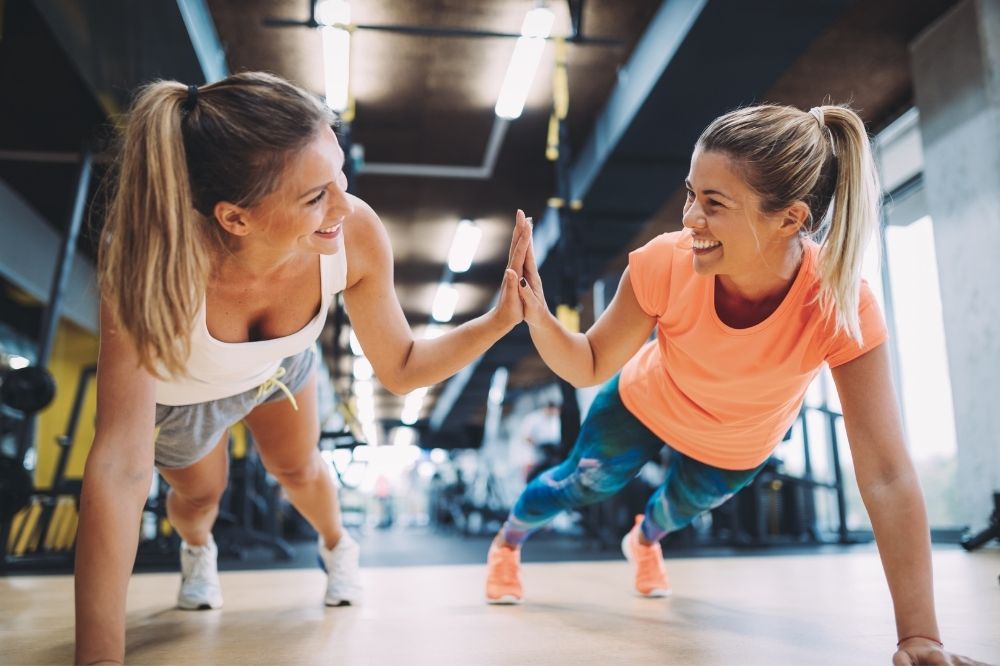
- Candid moments of clients, gym members, staff, and other community members
- Fitness gadgets and other tech used like fitness apps and software
- Sports shots from sports events
- Healthy food and nutrition images of meals, recipes, etc
- Swimming or underwater pictures
- Workout detail pictures of items like water bottles, whistles, towels, gym sneakers, etc
- Client transformation; before and after images
Conclusion
Photo shoots may not feel like a priority for running your fitness business, especially in the beginning. However, I urge you to think about the power of content and visuals in the fitness industry today. Fitness brands engage potential clients not just in person but online via social media platforms, websites, and more.
The visual content you share in these spaces can determine the success of your training programs and business.
Take personalized images with your brand photography style using this guide. Share them on your social media channels, Google My Business profile, and personal training website, etc.
Remember, an image can tell a thousand tales. Make sure your chosen visuals tell the right one to fitness clients across the digital space.